Upshabby challenge~ look at things differently

image image imageAre you able to do this? Too many of us get caught in the “it’s not ‘perfect'” conundrum. Sorry mom but I blame that “training” on you.

Those of you that have any understanding of me know that regularly I’ll say “it’s not ‘perfect’ but I don’t live in perfect.”

The pic of the washtub was a stretch. I knew that I wanted metal buckets for our wedding reception. Those buckets are $20 ea. Most people would think “big deal” but not Upshabby. I’d rather spend that $60 on something that matters to us.

I found this antique washing machine cylinder on CL. It was in great shape for the task I wanted it for. Ice bucket anyone?

I brought it home and painted the lid and added the key logo on top. It made sense to me as Ben bought me a key charm that looks antique that hangs around my neck.

Getting back to the challenge of looking at things differently. The coffee table was trash! Not only was it thrashed BUT it had been oil painted. No fears. It was free to me and after I Upshabby’d, I sold it for $75.

imageimage

There are several places within the blog that I’ve talked about how I do the transfers. I’ve asked people to “like” the Upshabby fb page. Even went so far as to say that if we went to xxx in likes I’d do a video tut on exactly how I do it.

Got a very few likes but I’m done with that. I feel like I’m begging people to allow me to teach them to get the same result. One person says, ” I don’t ‘follow’ but can you produce multiple for me to use?” Excuse me?

She knows who she is and she doesn’t read the blog so I needn’t be concerned. At some point I will do a tutorial but not yet. Feel free to send a message if you’re up for the challenge of looking at things differently.

Signed… Upshabby

Chalk Paint and graphics kind of day!

So today and yesterday were a combo of chalk paint and graphics. I redid the train case. It looks oh so much better. Esthetically it’s appealing. Then I decided to tackle the vintage Lady Baltimore suitcase. It looks fab! Added the Paris graphics. Every Paris piece of furniture I did sold quickly on CL so I threw her up too. I’ll test the water. It’s completely unique and there won’t be another just like it.

image

image

I picked up the vintage washing machine tub turned ice box. Based on the size I’d guess 1960s but who knows. The lid was spray painted. I redid that with chalk paint. I don’t know if we’ll keep it or if Ben will send it with his best man.

image

That’s pretty well it. I need to tackle bottle cap baubles tomorrow.

Signed… Upshabby

Tomorrow’s ToDo~

imageThe little things add a skip to my step. I have a vintage Lady Baltimore suitcase that I’m going to chalk paint and add a Paris graphic to it. I’ve blogged about the transfer process so if that’s of interest and you want to try it read the blog. 🙂

The other thing I’m going to do tomorrow is bottle cap jewelry. I have bottle caps, the puncher/ domer and my soldering iron. I’ll try my luck at it this time around and see how I do.

Stay tuned. We’ll see how far I get.

Signed… Upshabby

imageimage

Chalk painted shoes?! Great Gatsby!

Yes I have chalk painted nearly everything! Recall that our wedding theme is Roaring 20’s. Everything that I’d looked at online had the wingtip look. I thought to myself, “self you have a pair of black ones that you don’t wear. Upshabby THOSE.” I love to find things that I currently own and tweak them to find a “job.”

these shoes were picked up at Payless less than a year ago for less than $20. Once I knew that these were going to beTHE ones I was going to chalk paint, I got to work. The dress is white. It is full length and gorgeous. I wanted enough white to stand out yet not change them completely. My shoes needed some flapper attitude!

Upshabby'd shoes

Normally if I chalk paint I pull out a quart of paint from the garage. This area that I wanted white was very small so I went to the craft room for a 50 cent tube of paint from Walmart. For this project I used about 25% of that tube. Pour the paint in whatever you’re going to use to hold it. I picked up an empty soda can and turned it upside down. Squirt the paint, head to the water fountain and add a bit of water. It isn’t an exact measurement. I’ve chalk painted enough times to know the consistency that I’m going for. This is the important part. Pull out your baking soda and a pinch of soda. Mix it up.

The consistency you’re going for is pancake batter. The water thins it out but the soda is the “magic” and thickens it while giving the paint something to adhere with. I don’t know how else to describe it. The baking soda acts as the glue giving the paint the “legs” to grab on. If you add too much soda it’ll seem like it’s too much effort to spread it. Not enough will leave an impression that there is no way this’ll work. Mix it well and know that you can add until you feel it’s the correct consistency. As stated, I think of it as pancake mix.

Wax

Chalk paint is amazing. If I wanted these to be red instead of white I would have used a red tube of paint instead of white. I put 2 coats on these shoes and now that they’re done I’ll set them with wax. The wax acts as the glue keeping it all together. This is the exact way that I chalk painted the leather recliner, my former pink Ariat boots and now these wedding shoes. Ask yourself what you have that’s not being used that would IF it were a different color? Jump on it and have fun. Think Halloween. Costumes for theatre. This could be a huge help in many different venues. Come on… these are my wedding shoes to be worn with the tiered white dress that screamed flapper!

If this has given you an idea or you’ve had an “aha” moment… Share it!  Had I realized how simple it was to put a custom spin on things earlier in life? Pfffsh… share this and have fun! Lastly I’ll mention that the wingtip “dots” in the shoes that are now filled with white paint were done with the round end of a pin. I dipped the pin in paint and pushed it into the space. After that I took a damp paper towel to remove extra paint.

Our Wedding trunk… or DIY gift/ project…

Image

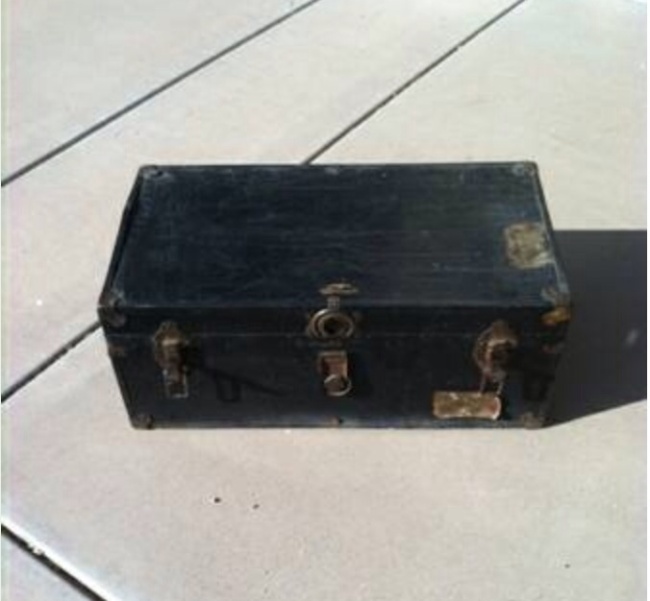
The trunk started off in the above condition. Not horrible based on its years but needing TLC. I picked up the trunk to use, tentatively, for a photo shoot. It’s got our names so common sense tells ya it’s OUR pics.

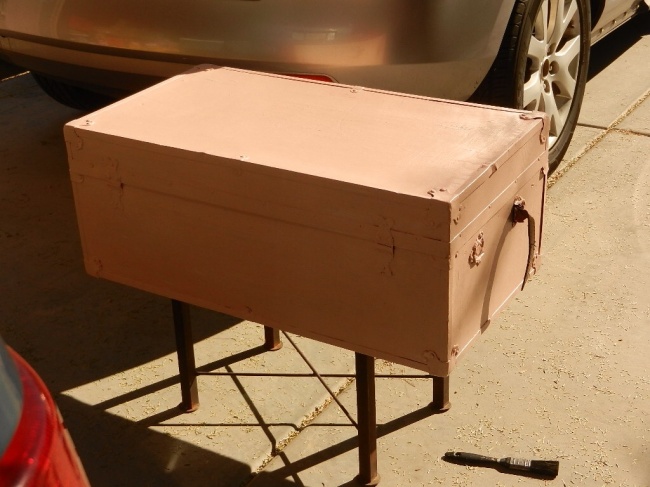
The process is time consuming but worth the effort. First task is to chalk paint the trunk. Doesn’t require sanding or primer. I love how user-friendly it is!  Once that was finished I let the paint cure for a few days. Then onto sanding to distress and bring out the hinges and metal trim. I’ll go at it one more time tomorrow to bring out more of the original characteristics.

Image

I planned on getting this posted earlier today but the best of plans? Y’all know that saying. I’m busy thinking about next week and what that opening door represents.

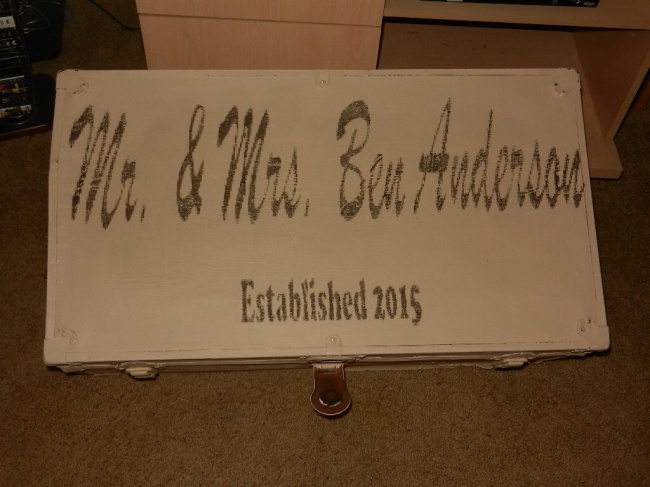
The final pic is the finished project. It isn’t perfect but that makes it more “realistic.” Especially knowing that it’s from approximately WWII. The trunk is gorgeous and represents a significant event. This will be a great functional piece of furniture. It may end up replacing the coffee table but that’s an unknown. I won’t sell it based on our names but I have another one in the car. It’s a tad bigger but may get offered up for sale with somebody else’s info.

When Ben and I have locked down a location, I’ll add that to the front panel that has the lock and key latch closure.  That’ll complete the trunk and it’ll become a permanent piece. The top surface will get clear coated to lock everything in. The body will remain as is to continue to distress as the years pass. But, as I said, I’ll distress it a bit more first. I love it and it screams Anderson!

Image

I challenge us all, myself included, to open our souls and find ways to repurpose and Upshabby life’s memories. Make them hold significance instead of tossing things aside so quickly.  If you want more info on how I add the graphics… Ask or flip through the Upshabby blog. It’s there… Signed Upshabby